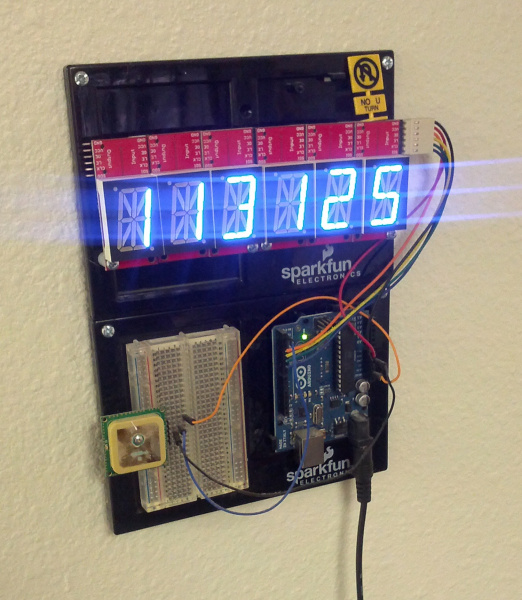
Ah, I remember it now - walking through the halls of the old SparkFun building and being amazed by all the cool projects. One project that caught my eyes was Nate's alphanumeric GPS wall clock.
Serial GPS Clock
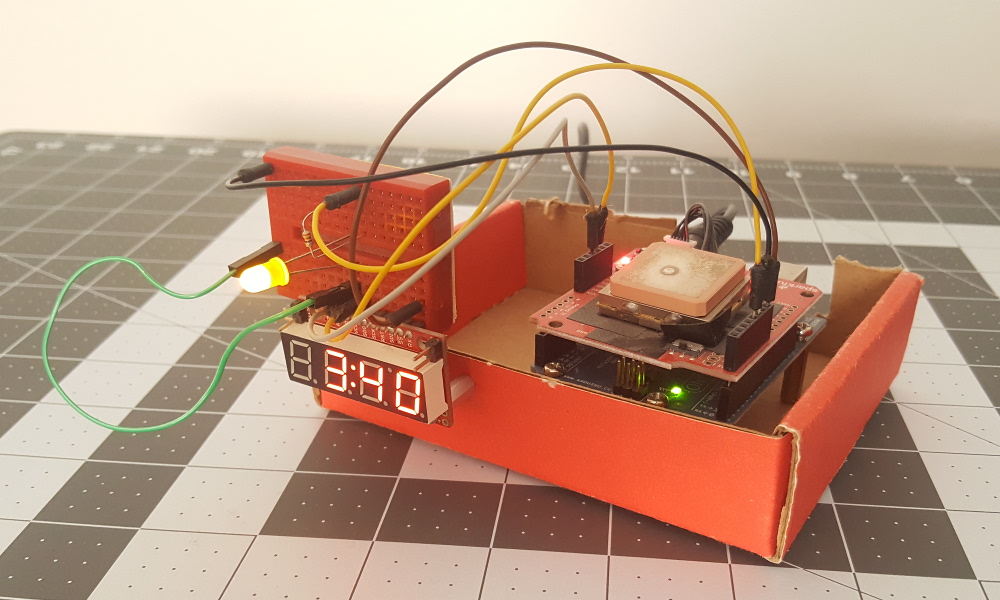
The alphanumeric GPS wall clock project inspired me to build my own one day. After working in technical support on a few cases related to GPS, I started getting familiar with GPS receivers and libraries. I gathered the parts and built a GPS clock of my own.
This required me to solder the parts together. I decided to use Mikal Hart's TinyGPSPlus library that did most of the heavy lifting to parse the serial data and wrote some code to display the current time as a challenge. It was big with wires sticking out, as expected from a prototype. I was quite satisfied with how it turned out and just left it mounted on a piece of cardboard.
Just like Nate, I had the same issue where we had to fall back and spring forward the time whenever daylight savings time hit. I had to adjust the code and re-upload back to the Arduino a few times. I decided to update the code by adding/subtracting an hour using a piece of jumper wire acting as a switch. It still works to this day!
Qwiic GPS Clock
Time flies and there have been advances in technology. With uBlox GPS modules and Qwiic-enabled devices, it's even quicker to build a GPS clock! For this version of the GPS clock, I managed to bring down the size of the clock using the Qwiic Micro with SAMD21 and Qwiic Micro OLED breakout. The Qwiic cables are more aesthetically pleasing to the eye compared to the dangling jumper wires connecting to a breadboard. What's great about the Qwiic Micro OLED is that it has the ability to draw characters and objects on the display. Thus, time can be displayed as a digital or analog clock.
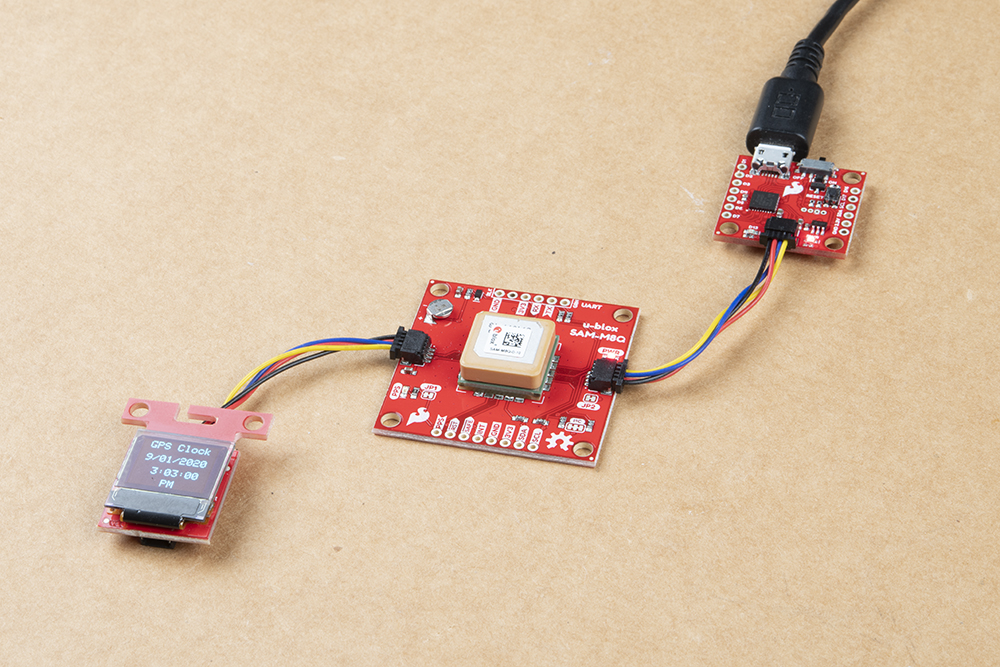
If you are looking to build a Qwiic-enabled GPS clock, check out the tutorial below! The tutorial uses the RedBoard Qwiic with ATmega328P for those that have an SparkFun Inventor's Kit v4.1 and were looking for another project. However, it was tested to work on the Qwiic Micro's SAMD21 should you decide to go smaller and want to try a different microcontroller as well.
The code can be adjusted for 12-hour/24-hour format depending on your personal preference. You'll need to tweak the code for daylight savings time depending on your region. If you decide to use a different output, you can grab the template to modify the code with your choice of display! At the time of this writing, I managed to squeezed in examples with the SerLCD and 7-segment serial LED display to display the date/time.
Qwiic GPS Clock
September 14, 2020
Making It Better
So what are the next steps to the project? I'd probably want to mount the Qwiic GPS clock on a panel or inside an enclosure. Or maybe add a Qwiic button to easily switch between modes depending on the display. To prevent the OLED from screen burn-in, I'd probably turn off the micro OLED when not in use and wake it up using a distance sensor. Until next time!
No comments:
Post a Comment